Install pymysql first

To connect to database

In Python, you need to create cursor first 

import pymysql

# To connect database
con = pymysql.connect(host = 'localhost',
                      user = 'root',
                      passwd = '1234',
                      port = 3306,
                      db = 'mysql',
                      charset = 'utf8')
# To create cursor
cursor = con.cursor()

# To execute SQL
cursor.execute('select * from user')

row = cursor.fetchone()         
print(type(row))                # 'tuple'
print(row)

rows = cursor.fetchall()        
print(type(rows))               # 'tuple'
print(rows)

for r in rows:
    print(r)

Create a table on MySQL workbench.

create table contact(
num int primary key auto_increment,
name varchar(100) not null,
phone varchar(20));

To insert data

import pymysql

try:
    con = pymysql.connect(host='localhost',
                          user='jspid',
                          passwd='jsppass',
                          port=3306,
                          db='jsptest',
                          charset='utf8')


    cursor = con.cursor()

    sql ="insert into contact(name, phone) values('Meadow','010-1111-2222')"

    cursor.execute(sql)
    con.commit()

    print('Successfully inserted')

except Exception as err:
    print(err)
finally:
    con.close()

If you search the inserted data on MySQL workbench, you will see them successfully inserted. 

To search data

import pymysql

try:
    con = pymysql.connect(host='localhost',
                          user='jspid',
                          passwd='jsppass',
                          port=3306,
                          db='jsptest',
                          charset='utf8')

    cursor = con.cursor()

    cursor.execute('select * from contact')

    row = cursor.fetchone()       
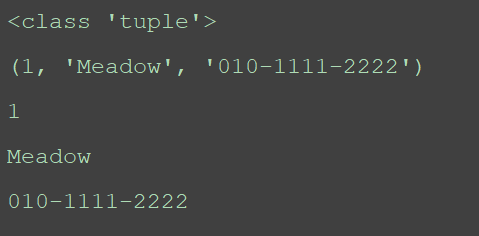
    print(type(row))                # 'tuple'
    print(row)                     

    for r in row:
        print(r)

except Exception as err:
    print(err)
finally:
    con.close()
To search all data

fetchall() prints tuples in python whereas, in sqlite and oracle, they print lists. 

import pymysql

try:
    con = pymysql.connect(host='localhost',
                          user='jspid',
                          passwd='jsppass',
                          port=3306,
                          db='jsptest',
                          charset='utf8')

    cursor = con.cursor()
    cursor.execute('select * from contact')
    rows = cursor.fetchall()    
    print(type(rows))               # 'tuple'
    print(rows)                     # cf. sqlite, oracle -> list (return)

    for r in rows:
        print(r)

except Exception as err:
    print(err)
finally:
    con.close()

To update

import pymysql

try:
    con = pymysql.connect(host='localhost',
                          user='jspid',
                          passwd='jsppass',
                          port=3306,
                          db='jsptest',
                          charset='utf8')
    cursor = con.cursor()
    sql = "update contact set phone='1234' where num=1"
    cursor.execute(sql)
    con.commit()
    
    print('Successfully updated')

except Exception as err:
    print(err)
finally:
    con.close()

To delete

import pymysql

try:
    con = pymysql.connect(host='localhost',
                          user='jspid',
                          passwd='jsppass',
                          port=3306,
                          db='jsptest',
                          charset='utf8')
    cursor = con.cursor()

    num = input('Insert the number to delete.')

    sql = 'delete from contact where num = %s'
    cursor.execute(sql, num)
    print('Delete')

# To search all data
    cursor.execute('select * from contact')
    rows = cursor.fetchall()         

    for r in rows:
        print(r)

#To count total data
    cursor.execute('select count(*) from contact')
    count = cursor.fetchone()          
    for c in count:
        print('Total data:', c)

    con.commit()

except Exception as err:
    print(err)
finally:
    con.close()

'Python' 카테고리의 다른 글

Python) Files input and output  (0) 2022.11.22
Python) Regular Expression  (0) 2022.11.21
Python) Database connection with SQLite  (0) 2022.11.19
Python) Class and Method  (0) 2022.11.18
Python) Database connection with Oracle  (0) 2022.11.18

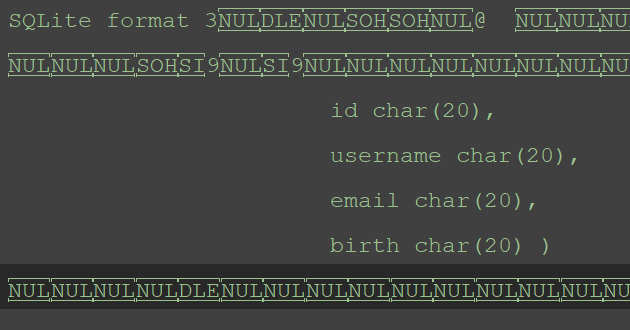
To create an SQLite database

import sqlite3

def create_table():
   con = sqlite3.connect('naverDB')     

   cursor = con.cursor()                

# To create user table
   cursor.execute('''create table user(
                       id char(20),
                       username char(20),
                       email char(20),
                       birth char(20) )
                  ''')

   con.commit()
   con.close()

if __name__=='__main__':
    create_table()

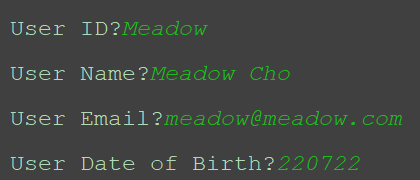
To insert data with insert SQL:

import sqlite3

try:
    # To connect to the database
    con = sqlite3.connect('naverDB')

    cursor = con.cursor()
    
    while True:
        data1 = input('User ID?')
        if data1 == '':
            break
        data2 = input('User Name?')
        data3 = input('User Email?')
        data4 = input('User Date of Birth?')

        # sql = "insert into user values('" + data1 + "','" + data2 + "','" + data3 + "','" + data4 + "')"
        sql = "insert into user values(?, ?, ?, ?)"
        cursor.execute(sql, (data1,data2,data3,data4))

    con.commit()

except Exception as err:
    print(err)
    print('Failed to connect to the database')
finally:
    con.close()

To search the inserted data


import sqlite3

try:
    # To connect to the database
    con = sqlite3.connect('naverDB')

    cursor = con.cursor()

    cursor.execute('select * from user')

    print( User ID\t User Name\t User Email\t User DOB')
    print('---------------------------------------')

    # row = cursor.fetchone()                 
    # print(type(row))                        # <class 'tuple'>
    # print(row)                             

    rows = cursor.fetchall()                  # To search all
    print(type(rows))                         # <class 'list'>
    print(rows)

    for r in rows:
        print(r[0], r[1], r[2], r[3])

except Exception as err:
    print(err)
    print('Failed to connect database')
finally:

To update 


import sqlite3

try:
    con = sqlite3.connect('naverDB')

    cursor = con.cursor()

    id = input('Insert User ID.')
    email = input('Insert a new user email.')

    sql = "update user set email=? where id=?"
    cursor.execute(sql, (email, id))

    con.commit()

    cursor.execute('select * from user')
    rows = cursor.fetchall()
    for r in rows:
        print(r[0],r[1],r[2],r[3])

except Exception as err:
    print(err)
    print('Failed to connect to database')
finally:
    con.close()

To delete

import sqlite3

try:
    con = sqlite3.connect('naverDB')

    cursor = con.cursor()

    id = input('Insert User ID to delete.')

    sql = 'delete from user where id = ?'

    cursor.execute(sql, (id,) )
    con.commit()
    print('Successfully deleted.')

    cursor.execute('select * from user')
    rows = cursor.fetchall()
    for r in rows:
        print(r[0],r[1],r[2],r[3])

except Exception as err:
    print(err)
    print('Failed to connect')
finally:
    con.close()

'Python' 카테고리의 다른 글

Python) Regular Expression  (0) 2022.11.21
Python) Database connection with MySQL  (0) 2022.11.20
Python) Class and Method  (0) 2022.11.18
Python) Database connection with Oracle  (0) 2022.11.18
Python) try: except:  (0) 2022.11.14

Connecting a Spring Starter Project with MyBatis is not complicated. If you want to learn how to create a Spring Starter Project, please refer to my last post linked below.

https://www.agilemeadow.com/entry/Spring-Boot-Basics-of-Spring-Boot-Lombok


Spring Boot) Basics of Spring Boot /Lombok

What is Spring Boot? Spring Boot is an extension of Spring, which eliminates the boilerplate configurations required for setting up a Spring application. Features Spring Boot enables the development of independent running spring applications because Tomcat

www.agilemeadow.com


To connect MyBatis with Spring Boot, we must create a table. 

Create a sql file in webapp/ sql and create a table and sequence. 

create table boardtest(
		no number primary key,
		name varchar2(20),
		subject varchar2(50),
		content varchar2(1000),
		register date
);
create sequence boardtest_seq;

select * from tab;
select * from seq;


Configuration

The biggest difference between Spring and Spring Boot is configuration files. Spring has six configuration files, whereas, Spring Boot has four. 


The configuration has to be done in main/resource/application.properties.

# port 
server.port=80

# view resolver
spring.mvc.view.prefix=/WEB-INF/views/
spring.mvc.view.suffix=.jsp

# oracle
spring.datasource.driverClassName=oracle.jdbc.driver.OracleDriver
spring.datasource.url=jdbc:oracle:thin:@localhost:1521:xe
spring.datasource.username=spring
spring.datasource.password=spring123

# mybatis
mybatis.config-location=classpath:mybatis-config.xml
mybatis.mapper-locations=classpath:mapper/*.xml

After setting the location of the view files, create WEB-INF and views folders.


Create folders for each roles. 

In the folders, you will put these classes: 

config - database connection class

controller - controller class

dao - DAO class

model - DTO class

service - service class


DataAccessConfig.java

package com.example.demo.config;

import javax.sql.DataSource;

import org.apache.ibatis.session.SqlSessionFactory;
import org.mybatis.spring.SqlSessionFactoryBean;
import org.mybatis.spring.SqlSessionTemplate;
import org.springframework.boot.context.properties.ConfigurationProperties;
import org.springframework.boot.jdbc.DataSourceBuilder;
import org.springframework.context.annotation.Bean;
import org.springframework.context.annotation.Configuration;
import org.springframework.context.annotation.PropertySource;
import org.springframework.core.io.support.PathMatchingResourcePatternResolver;

@Configuration
@PropertySource("classpath:/application.properties")          
public class DataAccessConfig {
	
	@ConfigurationProperties(prefix = "spring.datasource")    
	public DataSource dataSource() {
		return DataSourceBuilder.create().build();
	}
	
	@Bean
	public SqlSessionFactory sqlSessionFactory(DataSource dataSource) throws Exception{
		SqlSessionFactoryBean factoryBean=new SqlSessionFactoryBean();
		
		factoryBean.setDataSource(dataSource);
		factoryBean.setMapperLocations(
				new PathMatchingResourcePatternResolver().getResources("classpath:/mapper/*.xml")
				);
		factoryBean.setTypeAliasesPackage("com.example.demo.model"); // DTO Alias 설정
		return factoryBean.getObject();
	}
	
	@Bean
	public SqlSessionTemplate sessionTemplate(SqlSessionFactory sqlSessionFactory) {
		return new SqlSessionTemplate(sqlSessionFactory);
	}
}

board.xml

<?xml version="1.0" encoding="UTF-8" ?>
<!DOCTYPE mapper PUBLIC "-//mybatis.org//DTD Mapper 3.0//EN"
  "http://mybatis.org/dtd/mybatis-3-mapper.dtd">

<mapper namespace="boardns">

	<insert id="insert" parameterType="board"> 
		insert into boardtest values(boardtest_seq.nextval,#{name},#{subject},#{content},sysdate)
	</insert>
	
	<select id="list" resultType="board">
		select * from boardtest
	</select>
    </mapper>


Now, it is all set. What you are going to do is to create your project by yourself. 


index.jsp

<%@ page language="java" contentType="text/html; charset=UTF-8"
    pageEncoding="UTF-8"%>
<!DOCTYPE html>
<html>
<head>
<meta charset="UTF-8">
<title>Insert title here</title>
</head>
<body>

<script>
	location.href="boardform";
</script>

</body>
</html>

BoardController.java

	@RequestMapping("boardform")
	public String main() {
		System.out.println("controller in");
		return "boardform";
	}

boardform.jsp

<%@ page language="java" contentType="text/html; charset=UTF-8"
    pageEncoding="UTF-8"%>
<!DOCTYPE html>
<html>
<head>
<meta charset="UTF-8">
<title>New Post</title>
</head>
<body>
<form method="post" action="boardInsert">
<table border=1 align=center width=500>
	<caption>New Post</caption>
	<tr>
		<td>Writer</td>
		<td><input type=text name="name"></td>
	</tr>
	<tr>
		<td>Title</td>
		<td><input type=text name="subject"></td>
	</tr>
	<tr>
		<td>Content</td>
		<td><textarea cols="50" rows="5" name="content"></textarea></td>
	</tr>
	<tr>
		<td colspan=2 align="center">
			<input type=submit value="Submit">
			<input type=reset value="Cancel">
		</td>
	</tr>
</table>
</form>
</body>
</html>

boardlist.jsp

<%@ page language="java" contentType="text/html; charset=UTF-8"
    pageEncoding="UTF-8"%>
<%@ taglib prefix="c" uri="http://java.sun.com/jsp/jstl/core" %>
<%@ taglib prefix="fmt" uri="http://java.sun.com/jsp/jstl/fmt" %>     
<!DOCTYPE html>
<html>
<head>
<meta charset="UTF-8">
<title>Post List</title>
</head>
<body>
<a href="boardform">New Post</a> <br>
<table border=1 align=center width=800>
	<caption>Post List</caption>
	<tr>
		<th>No.</th>
		<th>Writer</th>
		<th>Title</th>
		<th>Date</th>
		<th>Content</th>
	</tr>	
	<c:forEach var="b" items="${list }">
	<tr>
		<td>${b.no}</td>
		<td>${b.name}</td>
		<td>${b.subject}</td>
		<td>
			<fmt:formatDate value="${b.register}" pattern="yyyy-MM-dd HH:mm:ss"/>
		</td>
		<td>${b.content}</td>
	</tr>
	</c:forEach>	
</table>
</body>
</html>


Regarding class and inheritance, in Python for data analysis, we don't use them a lot, however, if you want to handle Django, it is necessary to know about classes and inheritance.


Class Example1

class Animal:
    name = 'dog'              
    age = 5

a1 = Animal()
# print(name)               
print(a1.name)                
print(a1.age)                 

a1.name = 'cat'
a1.age = 10
print(a1.name)               
print(a1.age)                

a2 = Animal()
print(a2.name)                
print(a2.age)

Class Example2

self. is similar to this. in Java.

class Car:

    def __init__(self):             # Constructor
       self.color = 'red'           
       self.wheel_size = 16        
       self.displacement = 2000     

    def forward(self):              # Method
        print('D')
    def backward(self):
        print('R')
    def turn_left(self):
        print('L')
    def turn_right(self):
        print('RR')

car1 = Car()                       

print(car1.color)                   # red
print(car1.wheel_size)              # 16
print(car1.displacement)            # 2000

car1.forward()                     
car1.backward()                     
car1.turn_left()                    
car1.turn_right()

Instance 

if __name__ == "__main__" allows You to Execute Code When the File Runs as a Script but Not When It’s Imported as a Module. You cannot import this in the other files if the file contains if __name__ == "__main__".

# if __name__=='__main__':

class InstanceVar:
    def __init__(self):             # Constructor
        self.text_list = []         

    def add(self, *text):          
        self.text_list.append(text)

    def print_list(self):           
        print(self.text_list)

if __name__=='__main__':
    a = InstanceVar()               
    a.add('Python', 'Oracle', 'Spring')
    a.print_list()                  
    print(a.text_list)              

    b = InstanceVar()              
    b.add('Java','JSP','tensorflow','keras')
    b.print_list()                 
    print(b.text_list)

Without if __name__ == "__main__"

def add(a, b):
    return a+b

def sub(a, b):
    return a-b

print(add(20, 10))              # 30
print(sub(20, 10))              # 10

With if __name__ == "__main__"

With this if statement, you cannot import in the other files. 

def add(a, b):
    return a+b

def sub(a, b):
    return a-b

if __name__=='__main__':
    print(add(20, 10))              # 30
    print(sub(20, 10))              # 10

if __name__ == "__main__" Example1

class ContactInfo:
    def __init__(self, name, email):           	# Constructor with parameters
        self.name = name                        
        self.email = email                      

    def print_info(self):
        print('{0} : {1}'.format(self.name, self.email))

if __name__=='__main__':
    ahn = ContactInfo('Zac','hong@naver.com')  
    ahn.print_info()
    print('name:', ahn.name)
    print('email:', ahn.email)

    ca = ContactInfo('choongang','master@gmail.com')
    ca.print_info()
    print('name:', ca.name)
    print('email:', ca.email)

Static Method

In java, @ is called an annotation whereas, in Python, we call it "Decorator".

When you use this decorator, it is a static method(@staticmethod). With this, you do not use self.

class Calculator:

    @staticmethod
    def plus(a,b):                 
        return a+b

    @staticmethod
    def minus(a,b):
        return a-b

    @staticmethod
    def multiply(a,b):
        return a*b

    @staticmethod
    def divide(a,b):
        return a/b

if __name__=='__main__':             
    print('{0}+{1}={2}'.format(7,4, Calculator.plus(7,4)))
    print('{0}-{1}={2}'.format(7,4, Calculator.minus(7,4)))
    print('{0}*{1}={2}'.format(7,4, Calculator.multiply(7,4)))
    print('{0}/{1}={2}'.format(7,4, Calculator.divide(7,4)))


'Python' 카테고리의 다른 글

Python) Database connection with MySQL  (0) 2022.11.20
Python) Database connection with SQLite  (0) 2022.11.19
Python) Database connection with Oracle  (0) 2022.11.18
Python) try: except:  (0) 2022.11.14
Python) list  (0) 2022.11.08

You must install cx-oracle library in pycharm to demonstrate this.

To test Python with Oracle

import cx_Oracle

try:
    # con = cx_Oracle.connect('ID/PASSWORD@IP:1521/INSTANCE NAME')
    con = cx_Oracle.connect('scott/tiger@localhost:1521/xe')
    
    cursor = con.cursor()
    
    cursor.execute('select * from dept')
    # cursor.execute('select * from board0')

    row = cursor.fetchone()             
    print(type(row))                    # <class 'tuple'>
    print(row)                          # (10, 'ACCOUNTING', 'NEW YORK')

    rows = cursor.fetchall()           
    print(type(rows))                   # <class 'list'>
    print(rows)

except Exception as err:
    print(err)
finally:
    con.close()

To insert data

import cx_Oracle

try:
    con = cx_Oracle.connect('scott/tiger@localhost:1521/xe')
    cursor = con.cursor()

    no = int(input('Insert DEPT NO.'))
    name = input('Insert DEPT NAME.')
    local = input('Insert LOCATION.')

    sql = "insert into dept values(:no, :name, :local)"
    cursor.execute(sql, no=no, name=name, local=local)
    con.commit()
    print('Your data has been successfully inserted.')

except Exception as err:
    print(err)
finally:
    con.close()

To search data

import cx_Oracle

try:
    con = cx_Oracle.connect('scott/tiger@localhost:1521/xe')
    cursor = con.cursor()

    no = input('Enter DEPT NO to search.')

    sql = "select * from dept where deptno = :no"

    cursor.execute(sql, no = no)
    rows = cursor.fetchall()          
    for r in rows:
        print(r[0], r[1], r[2])

except Exception as err:
    print(err)
finally:
    con.close()

To update data

import cx_Oracle

try:
    con = cx_Oracle.connect('scott/tiger@localhost:1521/xe')
    cursor = con.cursor()

    no = input('Insert DEPT NO to update')
    name = input('Insert DEPT NAME to update')
    local = input('Insert LOCATION to update')

    sql = "update dept set dname=:name, loc=:local where deptno=:no"
    cursor.execute(sql, name=name, local=local, no=no)
    con.commit()
    print('Successfully updated')

except Exception as err:
    print(err)
finally:
    con.close()

To delete

import cx_Oracle

try:
    con = cx_Oracle.connect('scott/tiger@localhost:1521/xe')

    cursor = con.cursor()

    no = input('Insert DEPT NO to delete.')

    sql = "delete from dept where deptno = :no"

    cursor.execute(sql, no=no)
    con.commit()

    print('Successfully deleted.')

except Exception as err:
    print(err)
finally:
    con.close()

'Python' 카테고리의 다른 글

Python) Database connection with SQLite  (0) 2022.11.19
Python) Class and Method  (0) 2022.11.18
Python) try: except:  (0) 2022.11.14
Python) list  (0) 2022.11.08
Python) Control statements  (0) 2022.11.06

try: except: to handle the exceptions that occur while the codes run.

The format is like this:

try:
  print(x)
except:
  print("An exception occurred")

You can specify the exceptions. Here are some examples. 

list = [1, 2, 3]

try:
    index = int(input('Insert an index number.'))   # 0, 1, 2
    print(list[index]/0)
except ZeroDivisionError:              
    print('Cannot be divided into 0.')
except IndexError:                     
    print('Wrong index.')
except ValueError:                      
    print('Not a number.')

try: except: can have else: if there is no exception. 

else is opposed to except. Here is an example.

list = [1, 2, 3]

try:
    index = int(input('Insert an index number'))   # 0, 1, 2
    print('list[{0} : {1}]'.format(index, list[index]))
except Exception as err:
    print('Exception:{0}'.format(err))
else:
    print('Success')

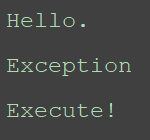
With finally: , you will execute the code without any conditions so even though there is an exception, you will see the finally statement will be executed.

try:
    print('Hello.')
    print(param)                    
except:
    print('Exception')
finally:
    print('Execute!')

You can also use else and finally in the same code. Try will test the excepted error to occur, except will handle the error, else will be executed if there is no exception, and finally gets executed either exception is generated or not. 

def divide(x, y):
    try:
        result = x // y
    except ZeroDivisionError:
        print("You cannot divide into 0. ")
    else:
        print("Answer: ", result)
    finally: 
        print('This is always executed')

raise is to define what kind of error to raise, and the text to print to the user.

def some_function():
    num = int(input('Insert an integer from 1 to 10'))
    if num<1 or num>10:    
        raise  Exception('Invalid number.{0}'.format(num))
    else:
        print('You inserted {0}.'.format(num))

try:
    some_function()                    
except Exception as err:
    print('Exception.{0}'.format(err))

'Python' 카테고리의 다른 글

Python) Class and Method  (0) 2022.11.18
Python) Database connection with Oracle  (0) 2022.11.18
Python) list  (0) 2022.11.08
Python) Control statements  (0) 2022.11.06
Python) Dictionary  (0) 2022.11.04

Client 요구사항 수정 및 보완 도중 

아이디찾기를 어떻게 할지 고민했습니다. 우리가 개발할 웹사이트는 실명 등 개인정보 인증 수단을 받지 않기 때문에

회원 가입 시 실명과 휴대폰 인증을 하지 않고, 아이디가 이메일 이기 때문에 아이디를 찾기를 했을 때 아이디를 받을 이메일 주소가 없습니다. 회의 끝에, 아이디는 바로 공개하고, 비밀번호는 휴대폰 번호와 이메일 아이디가 일치 했을 경우 메일로 임시 비밀번호를 전송하는 식으로 하기로 했습니다. 


인프런 강의를 들으면서 깃과 깃허브를 활용하는 방법을 배우며 실습하고 있습니다. 들어보시려면 아래 링크를 클릭해주세요.

https://www.inflearn.com/course/git-and-github


[무료] Git과 GitHub 시작하기 - 인프런 | 강의

배우기 어려운 Git의 사용법을 쉬운 Gui 프로그램인 SourceTree를 통해 익혀봅시다., - 강의 소개 | 인프런...

www.inflearn.com


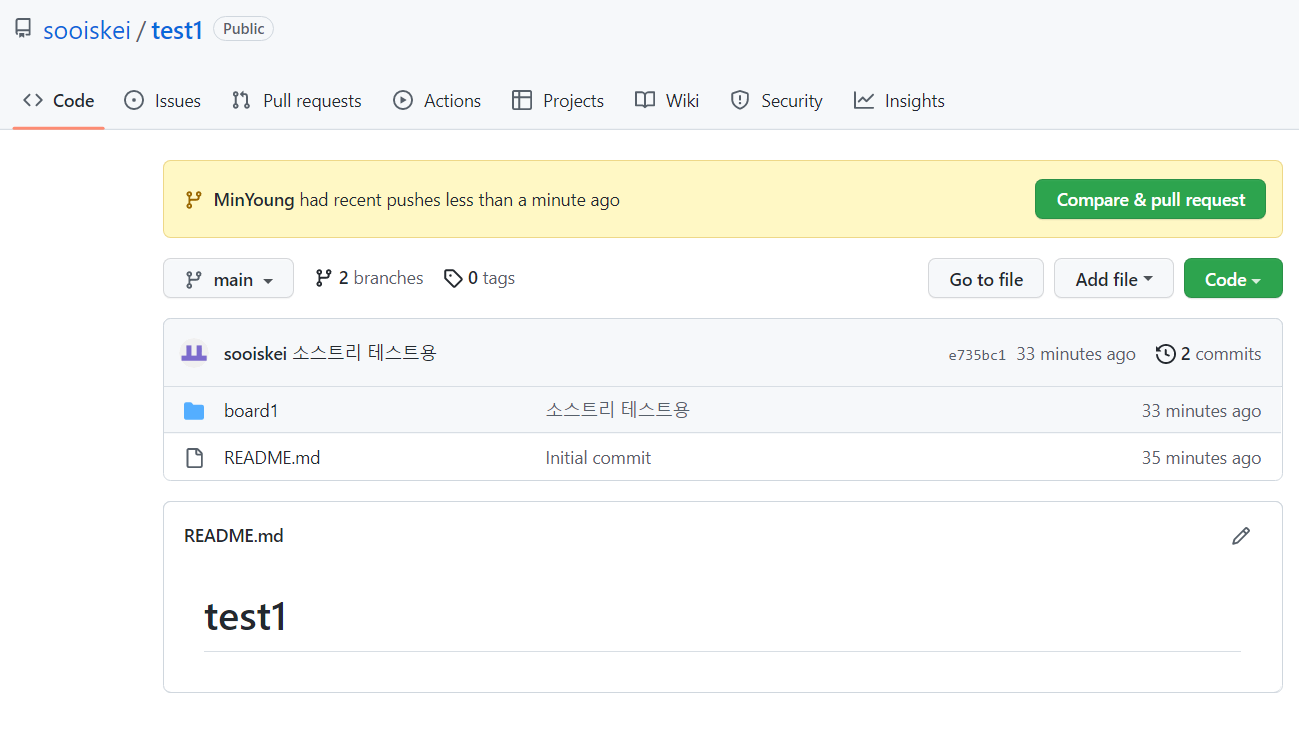
Git에서 Branch 생성하는 연습을 먼저 했습니다. 브랜치 생성 후 소스트리를 활용하여 commit and push도 했습니다. 

commit and push를 했을 경우에는 소스트리와 깃 원격 브랜치 모두에서 제가 기록한 메세지를 확인할 수 있습니다. 

브랜치 생성하여 연습


There are several Git GUI Clients like SourceTree, GitHub Desktop, GitKraken, SmartGit, etc.

In this post, I will demonstrate how to download and use SourceTree.


To download, click this link.

Sourcetree | Free Git GUI for Mac and Windows (sourcetreeapp.com)

When you download, you need to have an account with Bitbucket. If you don't have one, create one to proceed.

After the registration, it will ask if you have an SSH key, since I don't have it yet, I will click No. If you have one to load, click yes. 

Finally, you will see this Remote repositories window and the background icon. 

To connect the local repository and the remote repository, we must clone. 


When you merge the branches first and push, it will be easier. 

'Git & GitHub' 카테고리의 다른 글

GitHub) GitHub with STS/ Eclipse  (0) 2022.11.05

개발언어와 환경을 선정했습니다. 

Apache Tomcat, HTML, CSS, JavaScript, JQuery, Java, Spring MVC model, Oracle 등을 사용하기로 했습니다. 웹사이트 제작 후 호스팅은 aws 를 통하여 하고자 합니다. 


DB 설계를 위해서는 오라클 예약어에 대해서 알고 있어야 합니다. 예약어와 겹치는 경우는 테이블이나 컬럼이 생성되지 않습니다. 우리 팀의 경우 회원 테이블을 user라는 이름을 붙였는데 예약어이기 때문에 테이블 생성이 되지 않아 member로 수정하였습니다. 

https://docs.oracle.com/cd/B19306_01/em.102/b40103/app_oracle_reserved_words.htm


DB 설계는 먼저 회의를 통해 개괄적인 틀을 짜고,  eXERD로 구체적인 테이블명과 컬럼 명을 설정하였습니다. 그리고 각 제약조건을 설정하였습니다. 


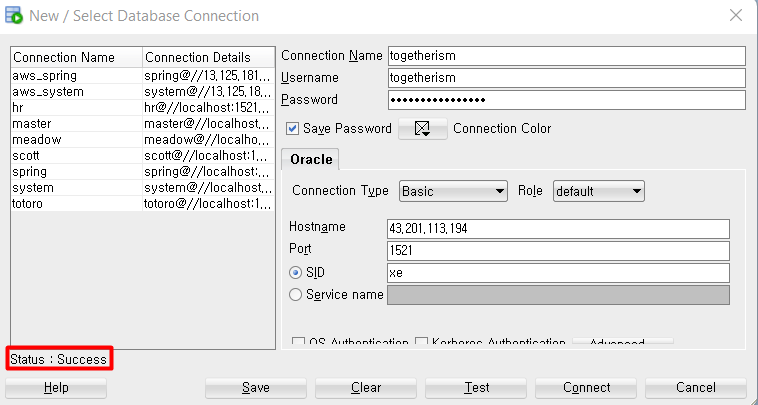
SQL Developer와 aws에 데이터 베이스를 연결했습니다. 

Spring 연결

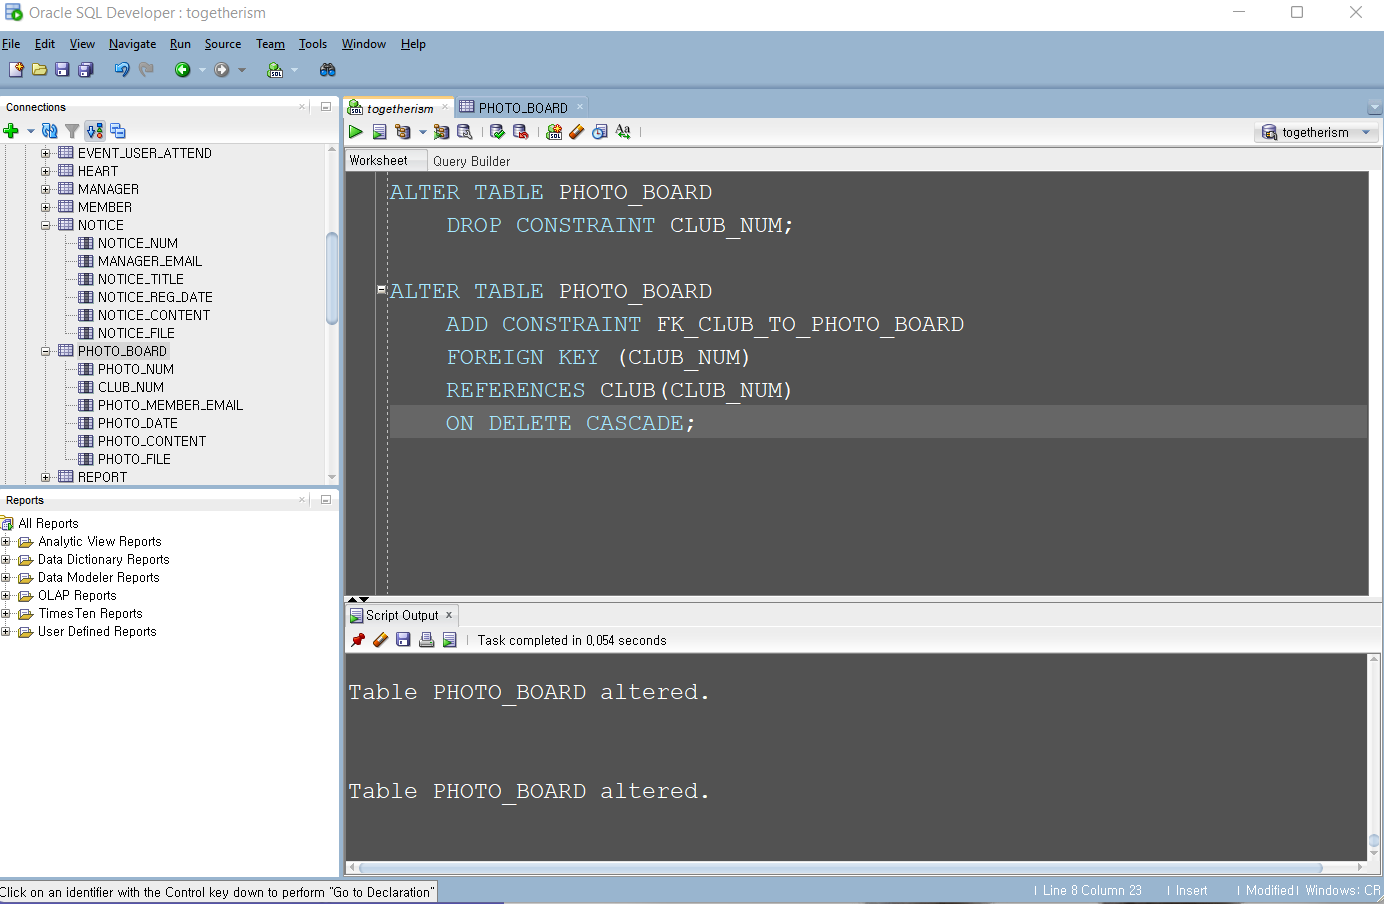
on delete cascade 외래키는 eXERD에서 이를 지원하지 않아  SQL Developer에서 진행했습니다. 

SQL Developer를 통해 Sequence table도 생성하였습니다. 


DB는 향후 개발과정에서 필요에 따라 수정 및 보완할 계획입니다. 


DB를 설계할 때 생각보다 어려웠던 점은 기억하기 쉽거나 한 눈에 들어오는 테이블 명이나 컬럼명을 만는 것이었습니다. 그리고 예약어를 미리 확인하지 않으면 이름들이 겹칠 수 있음을 알게되었습니다. 


append()

append() function is to add 

a = [1, 2, 3]
a.append(4)                 # add 4
print('a:', a)              # [1, 2, 3, 4]

a.append([5, 6])            # add [5, 6] 
print('a:', a)              # [1, 2, 3, 4, [5, 6]]

index()

It is like indexOf() in Java.

It is different from find()


pop()

To delete the last one

list = [10, 20, 30, 40, 50]
data1 = list.pop()             
print('data1:', data1)         
print('list:', list)           

data2 = list.pop(2)            
print('data2:', data2)          
print('list:', list)

insert()

a = [1, 2, 3]

# index no.0 -> put '4'
a.insert(0, 4)
print('a:', a)                  # [4, 1, 2, 3]

a.insert(3, 5)
print('a:', a)                  # [4, 1, 2, 5, 3]

sort()

namelist = ['Mary','Sams','Amy','Tom','Mike','Bob','Kelly']

namelist.sort()               # ascending order
print('namelist:', namelist)  

namelist.sort(reverse=True)    # descending order
print('namelist:', namelist)

sorted()

The difference between sort() and sorted() is that if you use sort(), the original list remains unchanged.

namelist = ['Mary','Sams','Amy','Tom','Mike','Bob','Kelly']

result1 = sorted(namelist)                  # ascending order
result2 = sorted(namelist, reverse= True)   # descending order
print(type(result1))                        # <class 'list'>
print(type(result2))

print('result1:', result1)  # ['Aimy', 'Bob', 'Kelly', 'Mary', 'Michale', 'Sams', 'Tom']
print('result2:', result2)  # ['Tom', 'Sams', 'Michale', 'Mary', 'Kelly', 'Bob', 'Aimy']

print('namelist:', namelist)


sort() and sorted() reverse() Example

# Change from [1, 3, 5, 4, 2] to [5, 4, 3, 2, 1]
list = [1, 3, 5, 4, 2]

#1. sort()
list.sort(reverse=True)                 
print('list:', list)

#2. sort(), reverse()
list.sort()                             
list.reverse()                          
print('list:', list)

#3. sorted()
list2 = sorted(list, reverse=True)     
print('list2:', list2)

#4. sorted(), reverse()
list3 = sorted(list)                   
list3.reverse()                         
print('list3:', list3)

list with dictionary

people = [
    {'name': 'noah', 'age': 19},
    {'name': 'liam', 'age': 23},
    {'name': 'jacob', 'age': 9},
    {'name': 'mason', 'age': 21}
]

# 1
people.sort(key=lambda x: x['age'])
print(people)

# 2
result = sorted(people, key=lambda x: x['age'])
print(result)

'Python' 카테고리의 다른 글

Python) Database connection with Oracle  (0) 2022.11.18
Python) try: except:  (0) 2022.11.14
Python) Control statements  (0) 2022.11.06
Python) Dictionary  (0) 2022.11.04
Python) Tuple / Set  (0) 2022.11.03

+ Recent posts