Before, let us look at the JSP Model1 architecture.
JSP Model1 architecture
We already made a DTO class in Java, and that is JavaBean.
JavaBean is a component written in Java.
There are some things that you need to consider when you make a Javabean.
1. In JavaBean, the member variable is called property. 2. Property is a field for storing values created by declaring the access controller private. 3. Properties are used as intermediate data storage when the contents of the JSP page are stored in the DB or when the contents stored in the DB are printed on the JSP page. 4. set() method and get() method are used a lot in JavaBean, and they mainly use public access modifiers. 5. The Java Bean file's storage location should be in the WEB-INF/classes folder.
We will make a java file called "SimpleBean.java" in the src folder.
You can easily write generate getters and setters by right-clicking the mouse.
SimpleBean.java
// JavaBean, DTO Class(Data Transfer Object)

package javaBean;

public class SimpleBean {

	private String msg;	    // Property

	public String getMsg() {
		return msg;
	}

	public void setMsg(String msg) {
		this.msg = msg;
	}

}
The <jsp:include>action tag includes other pages along with (<%@include file=heheader.jsp" %>). While the include directive simply contains text from a specific source, the <jsp:include> action tag includes the processing results of the page. You can include HTML, JSP, Servlet, and etc.
Let us look at the examples for a better understanding.
Both include directive tag and include action tag are similar in that they all include other pages, but the include directive tag contains only the text, whereas the include action tag contains the results of the page's processing.
Here is another example.
<Example 3>
includer.jsp
<%@ page contentType = "text/html; charset=euc-kr" %>

<html>
	<head><title>include Directive</title></head>
	<body>

<%
    int number = 10;
%>

<%@ include file="includee.jspf" %>

Common Variable DATAFOLDER = "<%= dataFolder %>"

	</body>
</html>
includee.jspf
The 'f' in jspf means 'fraction'.
<%@ page contentType = "text/html; charset=euc-kr" %>

Number saved in includer.jsp page: <%= number %>

<p>

<%
    String dataFolder = "c:\\data";
%>
The error data should exceed 512 bytes. If the length of the error page is less than 512 bytes, Internet Explorer does not print the error page that this page prints It outputs its own 'HTTP error message' screen. To print the contents of an error page correctly in Internet Explorer, you need to include the same in responding to this comment.
So far, we have discussed the formal way of handling exceptions, but unless you have just several pages, you will need to use the latter way tohandle exceptions using error-page element en web.xml file.
Instead of the errorPage directive, the error page can be specified in the web.xml file of <error-page> tags.
The web.xml file has to be in WEB-INF folder. Anything you need, to handle the exceptions, you have to put in the web.xml file. Here is the web.xml file.
Conditional statements and loops are used in Java and other languages since they simplify the codes.
Conditional statements, also called Selection statements, consist of two big statements: If statements and Switch ~ case statements.
Here are some examples for your better understanding.
if
public class If01 {

	public static void main(String[] args) {
		// TODO Auto-generated method stub

		if(10>5) {
			System.out.println("Executed 1");
		}

        // {} can be omitted if it is a single line.
		if(10>5) System.out.println("Executed 2");

		if(true) {
			System.out.println("Execute unconditionally");
		}

		if(false) {
			System.out.println("Execution failed");
		}

		if(10 > 30)
			System.out.println("Failed to print out");
			System.out.println("Condition isn't applied on this execution");

	}

}
if ~ else ( Even? or Odd? )
import java.util.Scanner;

public class If02 {

	public static void main(String[] args) {
		// TODO Auto-generated method stub

		System.out.println("Insert one integer.");

		Scanner sc = new Scanner(System.in);

		int n1 = sc.nextInt();

		if (n1 % 2 == 0) {
			System.out.println(n1+" is even.");
		}else {
			System.out.println(n1+" is odd.");
		}
	}

}
// 0 is considered as even number.
if ~ else if ~ else (Maximum and Minimum)
import java.util.Scanner;

public class If03 {

	public static void main(String[] args) {
		// TODO Auto-generated method stub

		int n1, n2, max, min;

		System.out.println("Insert two integers.");

		Scanner sc = new Scanner(System.in);

		n1 = sc.nextInt();
		n2 = sc.nextInt();

		if (n1 > n2) {
			max = n1;
			min = n2;

		}else {
			max = n2;
			min = n1;
		}
			System.out.println(max + " is the maximum.");
			System.out.println(min +" is the mininum.");


	}

}
Random number(Dice)
public class If06 {

	public static void main(String[] args) {
		// TODO Auto-generated method stub

		// Random numbers
		// 	0.0 <= Math.random() < 1.0
		//   1                      6
		System.out.println("E="+Math.E);
		System.out.println("PI="+Math.PI);
		System.out.println(Math.random());

		int num = (int)(Math.random()*6) + 1;
		System.out.println("num=" +num);

		if(num == 1) {
			System.out.println("1");
		}else if(num == 2){
			System.out.println("2");
		}else if(num == 3){
			System.out.println("3");
		}else if(num == 4){
			System.out.println("4");
		}else if(num == 5){
			System.out.println("5");
		}else {
			System.out.println("6");
		}
	}

}
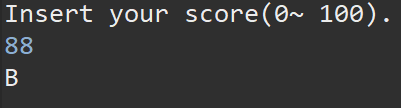
Score
import java.util.Scanner;

public class If05 {

	public static void main(String[] args) {
		// TODO Auto-generated method stub

		int n1;

		System.out.println("Insert your score.");

		Scanner sc = new Scanner(System.in);

		n1 = sc.nextInt();

		if(n1 >= 90) {
			System.out.println("A");
		}else if(n1 >= 80) {
			System.out.println("B");
		}else if(n1 >= 70) {
			System.out.println("C");
		}else if(n1 >=60) {
			System.out.println("D");
		}else {
			System.out.println("F");
		}

	}

}
This can also be written with Switch ~ case like below. Switch ~ case and If ~ else if ~ else statements do the same role, but the syntax is slightly different.
Switch ~ case (Score)
package p2022_06_23;

import java.util.Scanner;

public class Switch01 {

	public static void main(String[] args) {
		// TODO Auto-generated method stub

		System.out.println("Insert your score (0 ~ 100).");
		Scanner sc = new Scanner(System.in);

		int s = sc.nextInt();  // s = 95
		s = s / 10;            // s /= 10
		switch (s) {
			case 10 :
			case 9: System.out.println("A");
			     	 break;
			case 8: System.out.println("B");
				 	 break;
			case 7: System.out.println("C");
				 	 break;
			case 6: System.out.println("D");
				 	 break;
			default:System.out.println("F");
		}

	}

}
While these conditional statements above are runned once, there are loops if you want to write repetitive statements. There are three types of loops : For, While, and Do ~ while.
For01.java
public class For01 {

	public static void main(String[] args) {
		// TODO Auto-generated method stub

		int i;
		for(i=1; i<=10; i++) {
			System.out.println(i+"This is a for loop.");
		}
}
}
For02.java
public class For02 {

	public static void main(String[] args) {
		// TODO Auto-generated method stub

		// Sum of 1 ~ 10
		int sum = 0;  //Local Variable
		for(int i=1; i<=10; i++) {
			sum = sum + i;
		}
		// System.out.println("sum="+sum);
//		System.out.println("1~"+i+"="+sum);
		System.out.println("Sum="+sum);
	}

}
For03.java
public class For03 {

	public static void main(String[] args) {
		// TODO Auto-generated method stub

		int odd = 0;
		int even = 0;

		for(int i=1; i<=100; i+=2)
			odd += i;

		for(int i=0; i<=100; i+=2)
		even += i;
		System.out.println("Sum of all odd numbers from 1 to 100: "+odd);
		System.out.println("Sum of all even numbers from 1 to 100: "+even);

	}
}
For04.java (Multiplication Table)
import java.util.Scanner;

public class For04 {

	public static void main(String[] args) {
		// TODO Auto-generated method stub

		System.out.println("Insert one integer for a multiplication table.");
		Scanner sc = new Scanner(System.in);
		int dan = sc.nextInt();    // dan = 5

		System.out.println("["+dan+"]");
		for(int i=1; i<=9; i++)
			System.out.println(dan+"*"+i+"="+dan*i);


	}

}
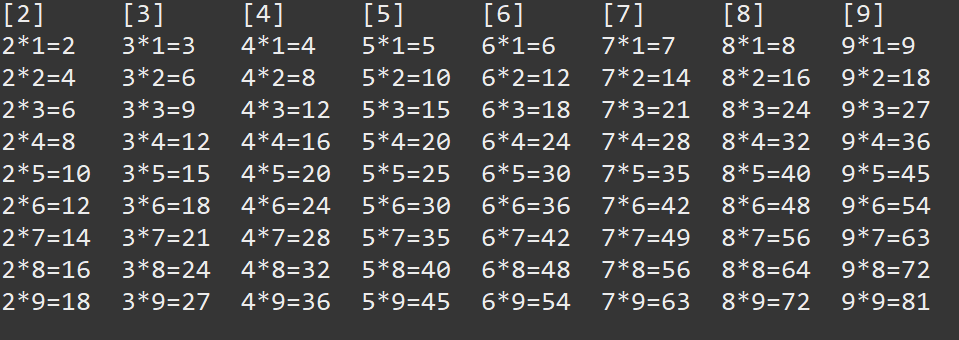
Multiplication Table
public class Multiplication Table {

	public static void main(String[] args) {
		// TODO Auto-generated method stub

		for(int i=2; i<10; i++) {
			System.out.print("["+i+"]"+"\t");
		}
		System.out.println();

		for(int j=1; j<10; j++) {
			for(int k=2; k<10; k++) {
				System.out.print(k+"*"+j+"="+k*j+"\t");

			}
			System.out.println();
		}
	}

}
While01.java
This is the same as For03.java, so you can choose one that makes your code more efficient.
public class While01 {

	public static void main(String[] args) {
		// TODO Auto-generated method stub


		int i=1, odd=0, even=0;
		while(i<=100) {
			if(i%2 == 1) {
				odd += i;
			}else {
				even += i;
			}
			i++;
		}
		System.out.println("Sum of all odd numbers from 1 to 100: "+odd);
		System.out.println("Sum of all even numbers from 1 to 100: "+even);
	}

}
The output will be the same.
Dowhile01.java
This is also the same as While01.java and For03.java.
public class DoWhile01 {

	public static void main(String[] args) {
		// TODO Auto-generated method stub

		int i=1, odd=0, even=0;
		do {
			if(i%2 == 1) {
				odd += i;
			}else {
				even += i;
			}
			i++;
		}while(i<=100);
		System.out.println("Sum of all odd numbers from 1 to 100: "+odd);
		System.out.println("Sum of all even numbers from 1 to 100: "+even);
	}

}
The result is also the same.
As you can see, the conditional statements and the loops have multiple options for you to choose from when you make your program, but the first thing you need to consider is "Efficiency." When we code, we need to consider the processing time and the length of the codes.
<%@ page contentType="text/html;charset=euc-kr"%>

<html>
<body>
	<h2>Page forwarding: forwardFrom1.jsp</h2>

	<%
		request.setCharacterEncoding("euc-kr");
	%>

	forwardFrom1.jsp content
	<br> You will not see this on a browser.

	<%
		// request object
	request.setAttribute("name", "Meadow");
	%>

	<jsp:forward page="forwardTo1.jsp" />

</body>
</html>
forwardTo1.jsp
You will not see the forwarded data on the browser.
<%@ page language="java" contentType="text/html; charset=UTF-8"
    pageEncoding="UTF-8"%>


    ID : <%=request.getParameter("id")%> <br>
    password : <%=request.getParameter("password")%> <br>

    Print out the value shared by the request object.<br>
    <%=request.getAttribute("name")%>
<%@ page contentType="text/html;charset=euc-kr"%>

<html>
	<body>

	<h1>Page forwarding(a.jsp)</h1>

	<%
		String name = request.getParameter("name");
		String bloodType = request.getParameter("bloodType");
	%>

	<b><%=name%></b>'s bloodtype is
	<b><%=bloodType%></b> and did you know that <p>
	people with type B blood are more susceptible to gastroenteric cancers?

	</body>
</html>
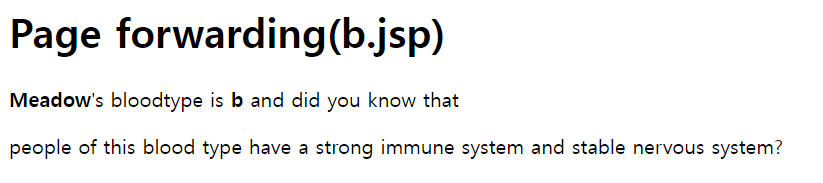
b.jsp
<%@ page contentType="text/html;charset=euc-kr"%>

<html>
	<body>

	<h1>Page forwarding(b.jsp)</h1>

	<%
		String name = request.getParameter("name");
		String bloodType = request.getParameter("bloodType");
	%>

	<b><%=name%></b>'s bloodtype is
	<b><%=bloodType%></b> and did you know that <p>
	people of this blood type have a strong immune system and stable nervous system?

	</body>
</html>
ab.jsp
<%@ page contentType="text/html;charset=euc-kr"%>

<html>
	<body>

	<h1>Page forwarding(ab.jsp)</h1>

	<%
		String name = request.getParameter("name");
		String bloodType = request.getParameter("bloodType");
	%>

	<b><%=name%></b>'s bloodtype is
	<b><%=bloodType%></b> and did you know that <p>
	type AB- is the rarest of all the blood types, with just 1% of the population having it?

	</body>
</html>
o.jsp
<%@ page contentType="text/html;charset=euc-kr"%>

<html>
	<body>

	<h1>Page forwarding(o.jsp)</h1>

	<%
		String name = request.getParameter("name");
		String bloodType = request.getParameter("bloodType");
	%>

	<b><%=name%></b>'s bloodtype is
	<b><%=bloodType%></b>, and did you know that <p>
	people with the bloodtype O are less susceptible to malaria?

	</body>
</html>
<%@ page contentType="text/html;charset=euc-kr"%>

<%
   String name = request.getParameter("name");
   String selectedColor = request.getParameter("selectedColor");
%>

<h2>Blue - <%=selectedColor+".jsp"%></h2>

<b><%=name%></b>'s color is "<%=selectedColor%>" and
it represents calmness and responsibility.<br><br>

<img src="<%=selectedColor+".jpg"%>" border="0" width="70" height="30">
green.jsp
<%@ page contentType="text/html;charset=euc-kr"%>

<%
   String name = request.getParameter("name");
   String selectedColor = request.getParameter("selectedColor");
%>

<h2>Green - <%=selectedColor+".jsp"%></h2>

<b><%=name%></b>'s color is "<%=selectedColor%>" and
it represents growth and renewal, being the color of spring and rebirth.<br><br>

<img src="<%=selectedColor+".jpg"%>" border="0" width="70" height="30">
red.jsp
<%@ page contentType="text/html;charset=euc-kr"%>

<%
   String name = request.getParameter("name");
   String selectedColor = request.getParameter("selectedColor");
%>

<h2>Red - <%=selectedColor+".jsp"%></h2>

<b><%=name%></b>'s color is "<%=selectedColor%>" and
it represents life, health, vigor, war, courage, anger, love and religious fervor.<br><br>

<img src="<%=selectedColor+".jpg"%>" border="0" width="70" height="30">
yellow.jsp
<%@ page contentType="text/html;charset=euc-kr"%>

<%
   String name = request.getParameter("name");
   String selectedColor = request.getParameter("selectedColor");
%>

<h2>Yellow- <%=selectedColor+".jsp"%></h2>

<b><%=name%></b>'s color is "<%=selectedColor%>" and
it symbolizes happiness, warmth and sunshine.<br><br>

<img src="<%=selectedColor+".jpg"%>" border="0" width="70" height="30">
By designating the name of the jpg files to the selectedColor, you can directly load them to the forward pages.
The last post of mine was about the basics of the scopes and focused on the application and the session among four scopes: Page, Request, Session, and Application.
A session is a concept used by servers and clients to maintain a connection state. Usually, if the login is successful, it is connected to the client as a session on the server side. At this time, member information is shared through the client's web browser connecting the session. Unlike cookies, the session does not store member information on the client's computer. Using a session, you don't have to take your membership information with you as you move the page. It is easier and safer to use than cookies.
<%@ page contentType="text/html; charset=euc-kr" %>

<html>
	<head><title>Session Example</title>
	</head>
	<body>

<%
	String id = "guardian23";
	String passwd = "1234";

	session.setAttribute("id", id);
	session.setAttribute("passwd", passwd);
%>
   The id and passwd property in the session are set.<br><br>

	<input type="button" value="Check properties in the session" onclick="javascript:window.location='viewSession.jsp'">
	</body>
</html>
To view session
You will see the id and the password with the enumeration type. This example is for when you don't know about the session name.
<%@ page contentType="text/html; charset=euc-kr" %>
<%@ page import="java.util.*" %>

<html>
	<head><title>Session Example</title></head>
	<body>

<%
	Enumeration attr = session.getAttributeNames();

	while(	attr.hasMoreElements()	){
		String attrName = (String)attr.nextElement();
		String attrValue = (String)session.getAttribute(attrName);
		out.println("The name of the session is " + attrName + ", and  ");
		out.println("the value of the session is " + attrValue + ".<br><br>");
	}
%>

	</body>
</html>
If you know the session name, you will use it this way.
<%@ page contentType="text/html; charset=euc-kr" %>
<%@ page import="java.util.*" %>

<html>
	<head><title>Session Example</title></head>
	<body>

<%
String id = (String)session.getAttribute("id"); //Downcast to String class
String passwd = (String)session.getAttribute("passwd");
%>

ID : <%=id %> <br>
Password : <%=passwd %> <br>


	</body>
</html>
The URL of the session is shared with the same browser.
When you log out or delete your account, you need to delete the session on the browser.
Cookies are small blocks of data created by a web server while a user is browsing a website and placed on the user's computer or other devices by the user's web browser. Cookies are placed on the device used to access a website, and more than one cookie may be placed on a user's device during a session.
The term "cookie" was coined by web-browser programmer Lou Montulli. It wasderived from the term "magic cookie", a packet of data a program receives and sends back unchanged, used by Unix programmers. The term magic cookie derives from the fortune cookie, a cookie with an embedded message.(Wikipedia)
Usually, cookies are issued to connect the server and the client. The picture following is how the cookies work.
Source: blog.csdn.net
The cookie is a concept used by servers and clients to maintain a connection state (login). Usually, if the login is successful, the server issues cookies and the cookies are issued by the client. The file is created in the temporary folder. On the server side, as you navigate the page, you can refer to the cookie information issued to the client's temporary folder. It is to maintain the connection status (login) between the server and the client. You don't have to take your membership information while moving the page with cookies.
Here are some basics of cookies in JSP.
To create cookies
Cookie cook = new Cookie (String name, String value);
Cookie cook = new Cookie ("id", "test");
To add cookies
response.addCookie(cook);
To edit the value of cookies
cook.setValue(newValue);
To set expired time
cook.setMaxAge(int expiry); // seconds
cook.setMaxAge(60*60); // an hour
To read cookies
Cookie[] cook = request.getCookie();

Name : cook.getNmae()
Value : cook.getValue()
If you feel you are more familiar with cookies, check out an example!
<%@ page contentType="text/html; charset=euc-kr" %>

<html>
	<head>
		<title>Brining cookies from a browser</title>
	</head>
	<body>
	<h2>Brining cookies from a browser</h2>

<%
	Cookie[] cook = request.getCookies();

	if( cook != null ){
		for(int i=0; i<cook.length;++i){
			if(cook[i].getName().equals("id")){
%>

		Name of the cookie is "<%=cook[i].getName()%>" and
		the value is "<%=cook[i].getValue()%>" .

<%
			}
		}
	}
%>

	</body>
</html>
To check the cookies that are created, on the browser that you want to check the cookies, enter F12 and see the cookies in the Application tap. The cookies will be there until the expired time you set.
Cookies track your behavior on websites and browsers, and they can target with ever more personalized content based on users’ engagement on web pages. Cookies can also be used to identify unique and returning visitors to a website. When a user visits a website, the site creates a cookie that stores data that identifies that user. If the user leaves the website and visits again, the website will recognize the user as a returning user. A good example of why this can be a huge help would be an e-commerce website that remembers the products you added to your cart the last time you visited, even though you didn't complete the purchase. However, when you let people use your browser account, they can see what kinds of sites you visit by peeking at your browser file — unless you get rid of them.(AVG)
Here are some more examples of cookies.
To create cookies
<%@ page contentType = "text/html; charset=euc-kr" %>
<%@ page import = "java.net.URLEncoder" %>

<%
    Cookie cookie = new Cookie("name", URLEncoder.encode("Meadow"));
    response.addCookie(cookie); // To create cookies
%>

<html>
	<head><title>Creating Cookies</title></head>
	<body>

<%= cookie.getName() %> Value = "<%= cookie.getValue() %>"

	</body>
</html>
To view the cookies list
<%@ page contentType = "text/html; charset=euc-kr" %>
<%@ page import = "java.net.URLDecoder" %>

<html>
	<head><title>Cookies List</title></head>
	<body>
	Cookies List<br>

<%
    Cookie[] cookies = request.getCookies();

    if (cookies != null && cookies.length > 0) {
        for (int i = 0 ; i < cookies.length ; i++) {
%>

			<%= cookies[i].getName() %> =
			<%= URLDecoder.decode(cookies[i].getValue()) %><br>

<%
        }//for end

    } else {
%>

		There is no cookies.
<%
    }
%>

	</body>
</html>
If you didn't set the expired time, the cookies will be deleted once you close the window. So, it would help if you opened the window to see the cookies.
There are two ways to modify the values of the cookies.
To modify value1
<%@ page contentType = "text/html; charset=euc-kr" %>
<%@ page import = "java.net.URLEncoder" %>

<%
    Cookie[] cookies = request.getCookies();

    if (cookies != null && cookies.length > 0) {
        for (int i = 0 ; i < cookies.length ; i++) {

            if (cookies[i].getName().equals("name")) {
                Cookie cookie = new Cookie("name", URLEncoder.encode("JSP Programming"));
                response.addCookie(cookie);

            }// if end

        }//for end
    }
%>

<html>
	<head><title>Modifying Cookies</title></head>
	<body>
		Change the value of cookie "name".
	</body>
</html>
To modify value2
<%@ page contentType = "text/html; charset=euc-kr" %>
<%@ page import = "java.net.URLEncoder" %>

<%
    Cookie[] cookies = request.getCookies();

    if (cookies != null && cookies.length > 0) {
        for (int i = 0 ; i < cookies.length ; i++) {

            if (cookies[i].getName().equals("name")) {
                cookies[i].setValue(URLEncoder.encode("Java and JSP"));
                response.addCookie(cookies[i]);
            }// if end

        }//for end
    }
%>

<html>
	<head><title>Modifying Cookies</title></head>
	<body>
		Change the value of cookie "name".
	</body>
</html>
Unlike creating cookies, there is no function to delete cookies. However, there is another way to delete them.
You will create a cookie with the name with a null value. Set the expired time '0' and use the response object.
To delete cookies
<%@ page contentType = "text/html; charset=euc-kr" %>
<%@ page import = "java.net.URLEncoder" %>

<%
    Cookie[] cookies = request.getCookies();
    if (cookies != null && cookies.length > 0) {
        for (int i = 0 ; i < cookies.length ; i++) {

            if (cookies[i].getName().equals("name")) {
                Cookie cookie = new Cookie("name", "");
                cookie.setMaxAge(0);
                response.addCookie(cookie);
            }//if end

        }//for end
    }
%>

<html>
	<head><title>Delete Cookies</title></head>
	<body>
		Delete cookie "name".
	</body>
</html>
No cookies in the list.
To set the expired time.
<%@ page contentType = "text/html; charset=euc-kr" %>

<%
    Cookie cookie = new Cookie("oneh", "1time");
    cookie.setMaxAge(60 * 60); // 60sec * 60 = 1 hour
    response.addCookie(cookie);
%>

<html>
	<head><title>Cookie's expired time</title></head>
	<body>

	In one hour, this cookie will be deleted.

	</body>
</html>
Post 방식으로 값을 전달 할 때는 Tomcat이 자동으로 인코딩하지 않으므로 인코딩을 먼저 시킨다음 값을 받아야 합니다.
대부분의 전송방식이 Post 방식이기 때문에 한글 인코딩은 항상 빠지지 않는 중요한 문제입니다.
Encoding should always be done first above. Otherwise, the Korean value is broken. Tomcat does not automatically encode the value when forwarding it in the Post method, so you must encode it first and then receive it. Since most transmission methods are Post, encoding Korean is always an important issue.
<%@ page contentType="text/html;charset=utf-8"%>


<%
// 한글 인코딩
// 1. 폼 파일에서 한글값이 get방식으로 전송될 때는 tomcat이 자동으로 utf-8로 인코딩을 시켜준다.
// 2. 폼 파일에서 한글값이 post 방식으로 전송될 때는 tomcat이 자동으로 인코딩을 시켜주지 않기 때문에
//    아래의 코드로 직접 인코딩해야 한다.
// 폼파일에서 한글값이 post방식으로 전송될때 utf-8로 인코딩을 시켜주는 역할

// Korean encoding
// 1. When the Korean value is transmitted in the form file by the get method, tomcat automatically encodes it to utf-8.
// 2. Tomcat does not automatically encode the Korean value in the form file when it is sent in the post method
//    It shall be encoded directly into the code below.
// The role of encoding the Korean values in the form file to utf-8 when they are transmitted by post.

	request.setCharacterEncoding("utf-8");
%>

<html>
<h1>Request Example1</h1>

<%
	String name = request.getParameter("name");
	String studentNum = request.getParameter("studentNum");
	String sex = request.getParameter("sex");
	String major = request.getParameter("major");
/*
	if(sex.equals("m")){
		sex = "male";
	}else{
		sex = "female";
	} */
%>

<body>
Name: <%=name%><p>
Student No.: <%=studentNum%><p>
Sex : <%=sex%><p>
Major : <%=major%>
</body>
</html>
get방식과 post 방식의 차이에 대해 궁금하시다면 이 상단의 링크를 참조해주세요.
If you are curious about the difference between get method and post method, please refer to the link above/ or refer to my last post, <JSP) Implicit Objects 1>.
Please comment below if you have any issues or questions about this post.
An out object is an output stream that transmits the results generated by the JSP page to the web browser, and all information that the JSP page sends to the web browser is transmitted through the out object. All information includes both script and non-script elements such as HTML and general text. Here are some examples of the out object.
You can check the size and the use of Buffer.
outEx.jsp
<%@ page contentType="text/html;charset=euc-kr" buffer="5kb"%>

<%
	int totalBuffer = out.getBufferSize();
	int remainBuffer = out.getRemaining();
	int useBuffer = totalBuffer - remainBuffer;
%>

<h1>Out Example</h1>
<b>Buffer status on current page</b><p>

Total Buffer Size : <%=totalBuffer%>byte<p>
Current Use of Buffer : <%=useBuffer%>byte<p>
Remain Buffer Size : <%=remainBuffer%>byte<p>
useOut.jsp
<%@ page contentType = "text/html; charset=euc-kr" %>

<html>
<head><title>out Object2</title></head>
<body>

<%
    out.println("What's up?");
%>
<br>

This is the result of
<%
    out.println("the basic out object.");
%>

</body>
</html>
println in JSP does not change the line.
To change the line, you need to put the <br> tag like this :
<%@ page contentType = "text/html; charset=euc-kr" %>

<html>
<head><title>out Object2</title></head>
<body>

<%
    out.println("What's up?<br>");
    out.println("Let's change the line.<br>");
%>
<br>

This is the result of
<%
    out.println("<br>the basic out object.");
%>

</body>
</html>